WooCommerce Checklist – Everything You Need To Do Before Launching Your Online Store
WooCommerce is one of the most powerful eCommerce platforms out there. With seemingly infinite possibilities on customization and features, this platform is a popular choice for stores of all sizes. Whether you’re a small business looking to get a few products online, or a large company planning to list thousands of products, WooCommerce is a viable option.
Because WooCommerce is a free, open-source plugin, the setup and integration of the program can vary from site to site. This all depends on what features and customizations you need to sell your products effectively.
In this article, we’re going to run through a fundamental checklist you can use to ensure your site is sale ready, regardless of your store size.

Quick Links
Store Info
A large majority of this checklist is done within the WooCommerce Settings. Here you will find options for store location, shipping, tax, emails and more.
The first step is to make sure your store information is filled out correctly. Navigate to the “General” tab within WooCommerce and start going through the fields. Ensure your address, selling locations, shipping locations, tax preferences and currency options are all correct for your store.
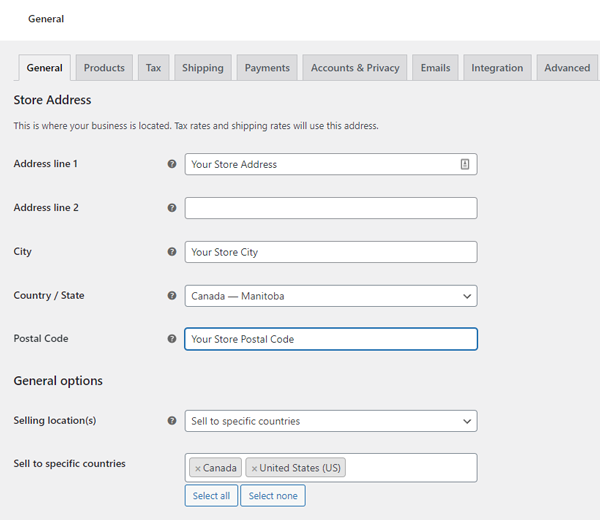
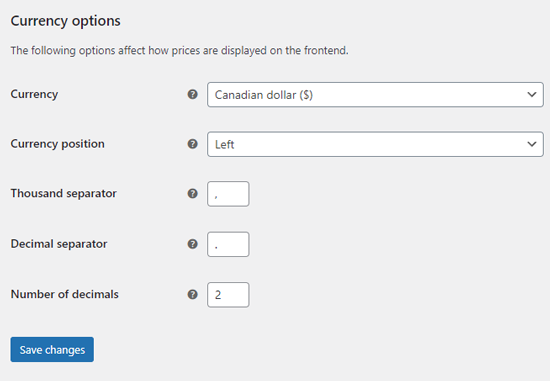
Once that is all correct, make sure to hit “Save” to save your changes.
Tax
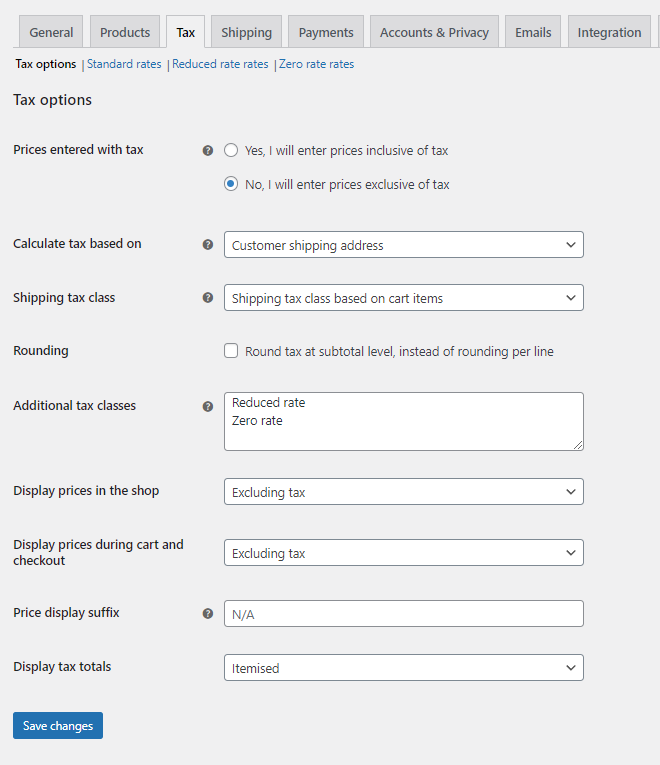
If you have enabled tax within the “General” tab, the next step is to setup tax rates. Head to the “Tax” tab within the WooCommerce Settings.
There are a few settings on the main tax options page that you will want to review before inputting the tax rates. Make sure they are all correct for your store, and then click on “Standard rates”. In this example we will not be using Reduced rates or Zero rates.
Standard rates are the tax rates your customers will pay at checkout. In this example, we want the tax rates based on the customer shipping address. Ensure you have tax rates setup for each region or zone you will be selling to.
If you will be selling within Canada, here is a quick tax rate spreadsheet you can import into your tax rates.

Shipping
For each location you plan on shipping to, you will need to setup a shipping zone. By default, WooCommerce gives you three shipping options.
Flat Rate
Local Pickup
Free Shipping
Ensure that each shipping zone has at least one shipping method associated with it. Additional shipping options such as Canada Post, UPS, ShipStation, and more are available to use with WooCommerce through plugins. These plugins allow you to generate real-time shipping rates for your products depending on where your customer is ordering from.

Payments
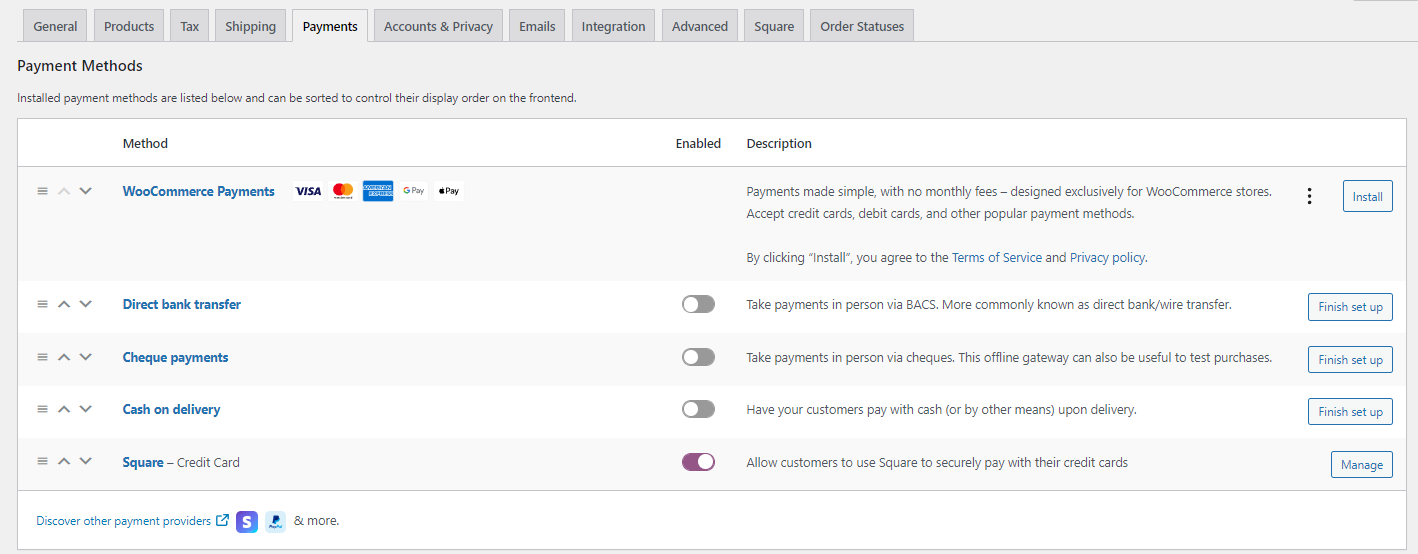
Before launching your store, you will need to make sure at least one payment option is available for your customers. Depending on the payment processor you choose, there may be a plugin you need to connect your store.
WooCommerce Payments is a popular option as WooCommerce suggests it by default and it allows you to view and manage all transactions directly within your website.
Once you’ve chosen a payment method, make sure to enable it in the “Payment” tab of the WooCommerce settings.
A full list of supported payment plugins can be found here.
Emails
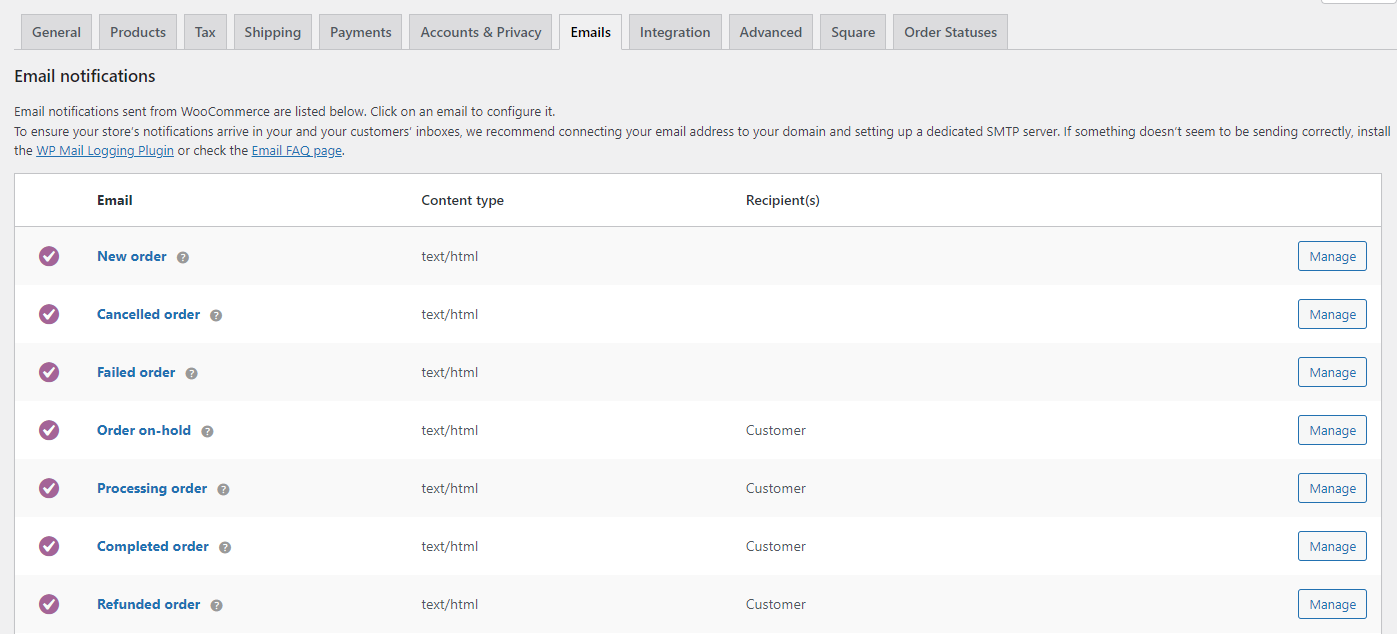
When an order is placed on your store, it’s important to have the proper emails go out. The customer will expect to receive a confirmation of some kind so they know their order went through, and you will need to receive a notification from your site letting you know about the order.
Within the “Emails” tab of the WooCommerce settings, you will see a list of different notification emails. Make sure you have the correct emails sending to the correct recipients. There are two core WooCommerce emails that customers can expect to receive when making a purchase from your store. One when they place the order, (this is the Processing order email) and one when their order is complete (Completed order).
Depending on your store, these two core emails may be enough to effectively communicate with your customer. If you require additional communication to go out during the order/shipping process, there are a number of plugins that allow you to set that up.
For example, if you want the customer to know that their product has been shipped, you could create a custom “Shipped” order status and have an additional email go out when that status is selected.
We like to use WooCommerce Order Status Manager when additional communication is required during the order process.
Once you’ve ensured these five core settings are setup correctly, you’re ready to launch your store.
We hope you found this checklist helpful. With the ever-growing feature and plugin list that WooCommerce offers, setting up an eCommerce store is a different process for every business. But making sure you have these five bases covered will get your store up and running with the fundamentals.
At Bankert Marketing, we’ve built countless WooCommerce stores for our clients. These stores range from basic DIY businesses to larger stores that require complex shipping, payment and order fulfillment processes.
If you need WooCommerce help or are interested in finding out how we can help grow your store, contact us today.